Adding SQLCipher to Xcode Projects
SQLite is already a popular API for persistent data storage in iOS apps so the upside for development is obvious. As a programmer you work with a stable, well-documented API that happens to have many good wrappers available in Objective-C, such as FMDB and Encrypted Core Data. All security concerns are cleanly decoupled from application code and managed by the underlying framework.
The framework code of the SQLCipher project is open source, so users can be confident that an application isn’t using insecure or proprietary security code. In addition, SQLCipher can also be compiled on Android, Linux, OS X and Windows for those developing cross-platform applications.
Using SQLCipher in an iOS app is fairly straightforward. This document describes integrating SQLCipher into an existing iOS project using the Community Edition source code build process. This tutorial assumes some familiarity with basic iOS app development and a working install of Xcode (6.1.1). The same basic steps can be applied to OS X projects as well.
? Hot Tip: Commercial Edition static libraries are available for you to drop right into your project if you’d like to skip all this and receive personalized support from our crack development team! Binaries and helpful projects integrations are available for all supported platforms. Learn more »
Prerequisites
Xcode with an iOS or OS X SDK installed. Visit the Apple Developer site for more information on downloading the latest Xcode and iOS and OS X SDKs.
OpenSSL
OpenSSL is no longer required for building SQLCipher on iOS and OS X, as the project by default uses Apple’s CommonCrypto framework for hardware-accelerated encryption. You can still build SQLCipher with other crypto providers like OpenSSL if you’d prefer, or you can write your own.
SQLCipher
Fire up the Terminal app, switch into your project’s root directory and checkout the SQLCipher project code using Git:
$ cd ~/Documents/code/SQLCipherApp
$ git clone https://github.com/sqlcipher/sqlcipher.git
Xcode Project Configuration
The SQLCipher source provides a sqlcipher.xcodeproj project file that we’ll add to your project to build a static library that you’ll link from your main application target.
Add Project Reference
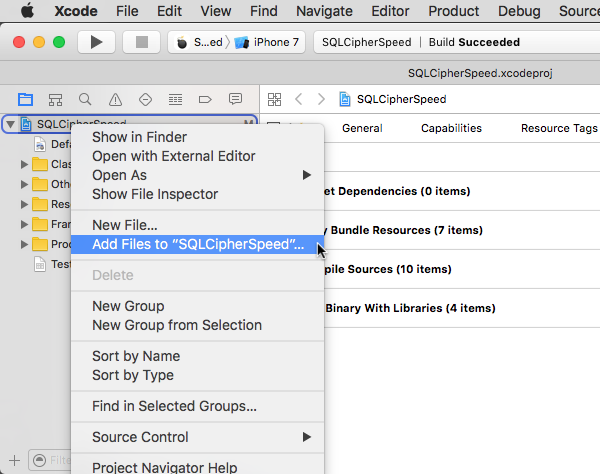
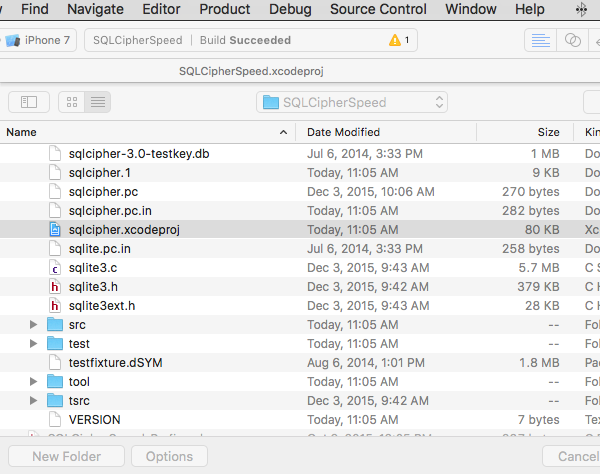
Open your iOS app’s project or workspace in Xcode, open the Project Navigator (command+1), and click on the top-level Project icon for your iOS app. Right click on the project and choose “Add Files to “My App”” (the label will vary depending on your app’s name). Since we cloned SQLCipher directly into the same folder as your iOS app you should see a sqlcipher folder in your root project folder. Open this folder and select sqlcipher.xcodeproj:
Project Settings
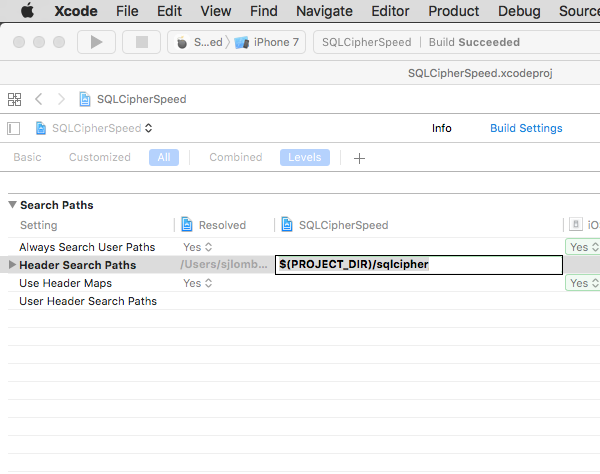
Navigate to your Project settings (make sure you don’t select the application target level). Select the Build Settings pane. In the search field, type in “Header Search Paths”. Double-click on the field under the target column and add the following path: $(PROJECT_DIR)/sqlcipher/src:
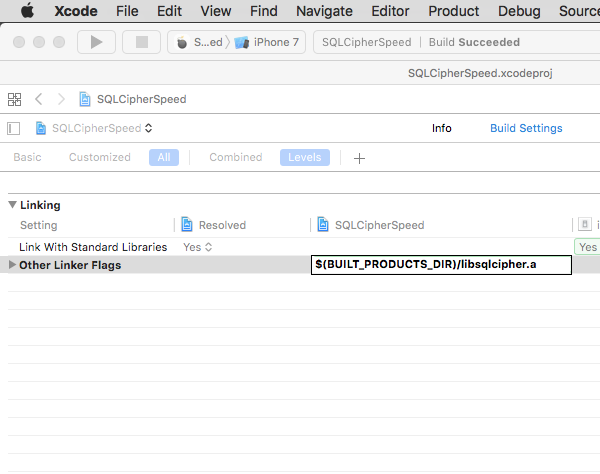
Next, add a setting to ensure that SQLCipher is the first library linked with your application in the “Other Linker Flags” setting. Start typing “Other Linker Flags” into the search field until the setting appears, double click to edit it, and add the following value: $(BUILT_PRODUCTS_DIR)/libsqlcipher.a
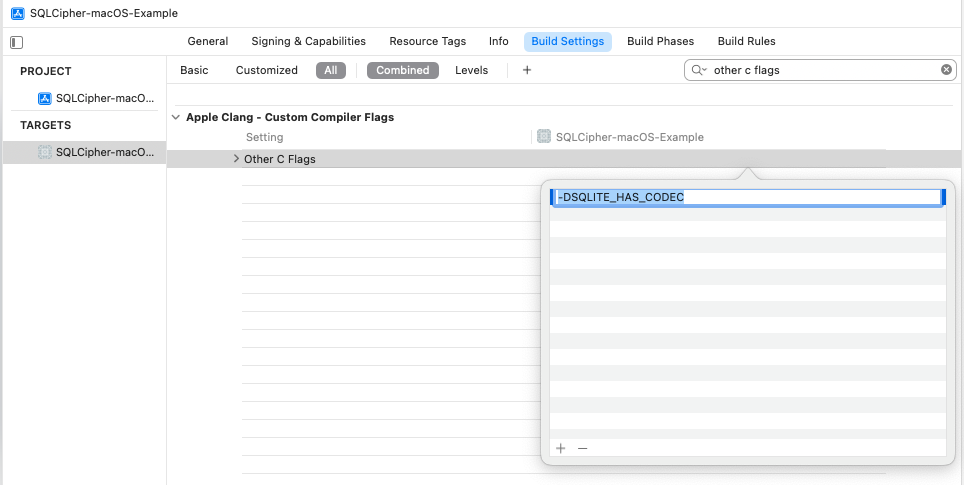
You will next edit one other setting on your Project to ensure the SQLCipher builds correctly—”Other C Flags.” Start typing “Other C Flags” into the search field until the setting appears, double click to edit it, and in the pop-up add the following value: -DSQLITE_HAS_CODEC
Target Settings
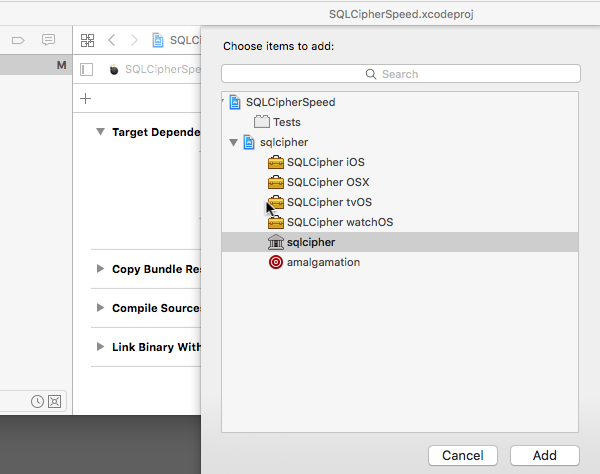
Next, navigate to the Target Level settings. Add a Target dependency to each of your application targets to ensure that SQLCipher is compiled before the application code. In Xcode’s Project Navigator (command+1), select your app’s Project file and in the Editor pane select Build Phases and your app’s main target (not the project file).
Expand Target Dependencies and click on the + button at the end of the list. In the browser that opens, select the sqlcipher static library target:
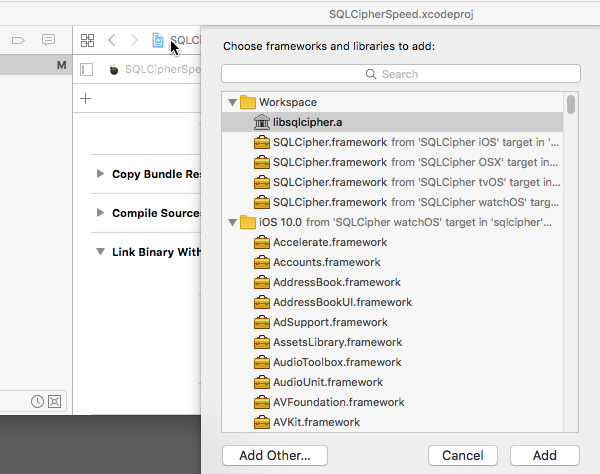
Expand Link Binary With Libraries, click on the +button at the end of the list, and select the libsqlcipher.a library.
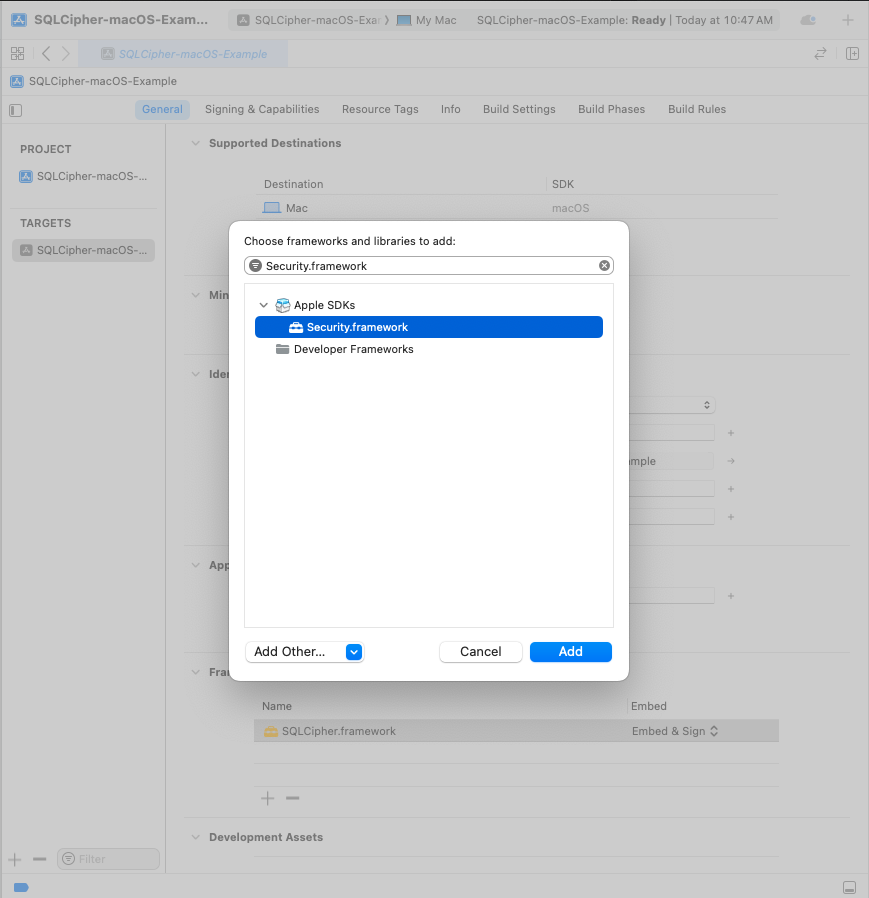
Finally, also under Link With Libraries, add Security.framework.
? Hot Tip: If libsqlite3.dylib or another SQLite framework is listed in your Link Binary With Libraries list be sure to remove it!
Repeat these steps for any other targets in your project that will depend on SQLCipher, i.e. unit tests.
Integration Code
Now that the SQLCipher library is incorporated into the project you can start using the library immediately. Telling SQLCipher to encrypt a database is easy:
- Open the database
- Use the sqlite3_key function to provide key material. In most cases this should occur as the first operation after opening the database.
- Run a query to verify the database can be opened (i.e. by querying the schema)
- As a precautionary measure, run a query to ensure that the application is using SQLCipher on the active connection
#import <sqlite3.h>

...
NSString *databasePath = [[NSSearchPathForDirectoriesInDomains(NSDocumentDirectory, NSUserDomainMask, YES) objectAtIndex:0]
                          stringByAppendingPathComponent: @"sqlcipher.db"];
sqlite3 *db;
bool sqlcipher_valid = NO;

if (sqlite3_open([databasePath UTF8String], &db) == SQLITE_OK) {
    const char* key = [@"BIGSecret" UTF8String];
    sqlite3_key(db, key, strlen(key));
    if (sqlite3_exec(db, (const char*) "SELECT count(*) FROM sqlite_master;", NULL, NULL, NULL) == SQLITE_OK) {
      if(sqlite3_prepare_v2(database, "PRAGMA cipher_version;", -1, &stmt, NULL) == SQLITE_OK) {
        if(sqlite3_step(stmt)== SQLITE_ROW) {
          const unsigned char *ver = sqlite3_column_text(stmt, 0);
          if(ver != NULL) {
            sqlcipher_valid = YES;

            // password is correct (or database initialize), and verified to be using sqlcipher

          }
        }
        sqlite3_finalize(stmt);
      }
    }
    sqlite3_close(db);
}
In most cases SQLCipher uses PBKDF2, a salted and iterated key derivation function, to obtain the encryption key. Alternately, an application can tell SQLCipher to use a specific binary key in blob notation (note that SQLCipher requires exactly 256 bits of key material), i.e.
PRAGMA key = "x'2DD29CA851E7B56E4697B0E1F08507293D761A05CE4D1B628663F411A8086D99'";
Once the key is set SQLCipher will automatically encrypt all data in the database! Note that if you don’t set a key then SQLCipher will operate identically to a standard SQLite database.
Testing and Verification
There are a number of ways that you can verify SQLCipher is working as expected in your applications before its release to users.
After the application is wired up to use SQLCipher, take a peek at the resulting data files to make sure everything is in order. An ordinary SQLite database will look something like the following under hexdump. Note that the file type, schema, and data are clearly readable.
% hexdump -C plaintext.db
00000000  53 51 4c 69 74 65 20 66  6f 72 6d 61 74 20 33 00  |SQLite format 3.|
00000010  04 00 01 01 00 40 20 20  00 00 00 04 00 00 00 00  |.....@  ........|
...
000003b0  00 00 00 00 24 02 06 17  11 11 01 35 74 61 62 6c  |....$......5tabl|
000003c0  65 74 32 74 32 03 43 52  45 41 54 45 20 54 41 42  |et2t2.CREATE TAB|
000003d0  4c 45 20 74 32 28 61 2c  62 29 24 01 06 17 11 11  |LE t2(a,b)$.....|
000003e0  01 35 74 61 62 6c 65 74  31 74 31 02 43 52 45 41  |.5tablet1t1.CREA|
000003f0  54 45 20 54 41 42 4c 45  20 74 31 28 61 2c 62 29  |TE TABLE t1(a,b)|
...
000007d0  00 00 00 14 02 03 01 2d  02 74 77 6f 20 66 6f 72  |.......-.two for|
000007e0  20 74 68 65 20 73 68 6f  77 15 01 03 01 2f 01 6f  | the show..../.o|
000007f0  6e 65 20 66 6f 72 20 74  68 65 20 6d 6f 6e 65 79  |ne for the money|
Fire up the SQLCipher application in simulator and look for the application database files under /Users/sjlombardo/Library/Application Support/iPhone Simulator/5.0/Applications/<Instance ID>/Documents. Try running hexdump on the application database. With SQLCipher the output should looks completely random, with no discerning characteristics at all.
% hexdump -C sqlcipher.db
00000000  1b 31 3c e3 aa 71 ae 39  6d 06 f6 21 63 85 a6 ae  |.1<..q.9m..!c...|
00000010  ca 70 91 3e f5 a5 03 e5  b3 32 67 2e 82 18 97 5a  |.p.>.....2g....Z|
00000020  34 d8 65 95 eb 17 10 47  a7 5e 23 20 21 21 d4 d1  |4.e....G.^# !!..|
...
000007d0  af e8 21 ea 0d 4f 44 fe  15 b7 c2 94 7b ee ca 0b  |..!..OD.....{...|
000007e0  29 8b 72 93 1d 21 e9 91  d4 3c 99 fc aa 64 d2 55  |).r..!...<...d.U|
000007f0  d5 e9 3f 91 18 a9 c5 4b  25 cb 84 86 82 0a 08 7f  |..?....K%.......|
00000800
Other sensible testing steps include:
- Attempt to open a database with a correct key and verify that the operation succeeds
- Attempt to open a database with an incorrect key and verify that the operation fails
- Attempt to open a database without any key, and verify the operation fails
- Programtically inspect the first 16 bytes of the database file and ensure that it contains random data (i.e. not the string
SQLite Format 3\0)
来源:https://www.zetetic.net/sqlcipher/ios-tutorial/